Using the toolbar
At the top of a document’s main window, the toolbar provides buttons for a lot of actions that you commonly need to use frequently. If you have used other Mac applications before, you will be familiar with the concept.
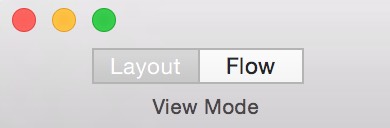
By using the mode control, you can switch between the “layout” mode — a representation of your publication in which you have full control over layouting and formatting of your content — and “flow” mode — a representation suitable for smartphone screens, which is automatically derived from your layout.
The toolbar also sports buttons to create new content elements on the currently selected page. By clicking them, a new element will be placed on the stage, which you can then proceed to customize.

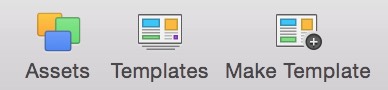
There are also buttons to open the current document’s Asset Manager and your Template Manager. Additionally, you can also create a new, personal template from the contents of the current page by clicking the “Make Template” button.
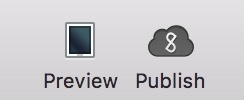
The two most important buttons are probably the “Preview” and the “Publish” button! In the Preview your work will be simulated in a browser and have every functionality included - just as if it’s online. Ready to go? Click “Publish and a dialog with which you can upload your current document to pagestrip.com opens. Your stories will look stellar in your kiosk!
In this set of buttons you can open the Styles Manager, hide or show the inspector and switch the inspector into “Setup” mode, where you can change settings (such as grid behavior) that affect your entire document.

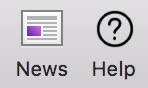
In the final set of buttons you find the news and help section. Within “News” you get a short overview of every new update we’ve released to make working with pagestrip more fluid. Click “Help” when you’re stuck and browse through video tutorials, help book and our quick tour for starters.
Need more help? Please let us know!