Connecting text boxes
In pagestrip, text is always edited in the context of individual text boxes — However, you can also connect text boxes, so that text flows freely between them. This works even across multiple pages.
Connecting two (or more) text boxes triggers the following behaviors:
- Text flows between the boxes if you resize them or add additional text.
- Depending on which text box a word ends up in, the box format is applied.
- A chain of connected text boxes holds exactly one contiguous text asset.
Let’s suppose you have these two text boxes that you want to connect. Right now, both of them contain different text.
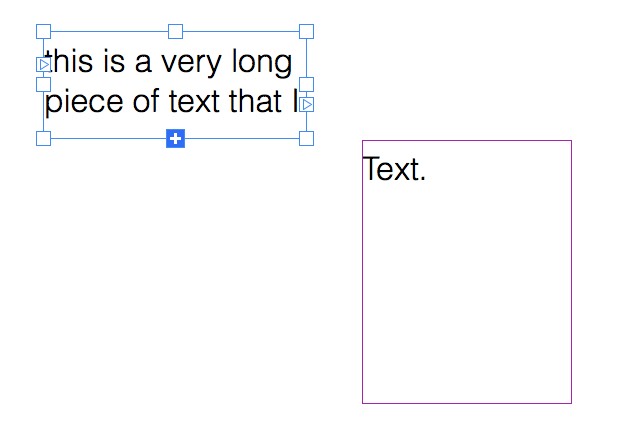
Note that the selected textbox shows that it contains overflowing text that is currently not visible by displaying a “+” icon as its bottom-center drag handle.
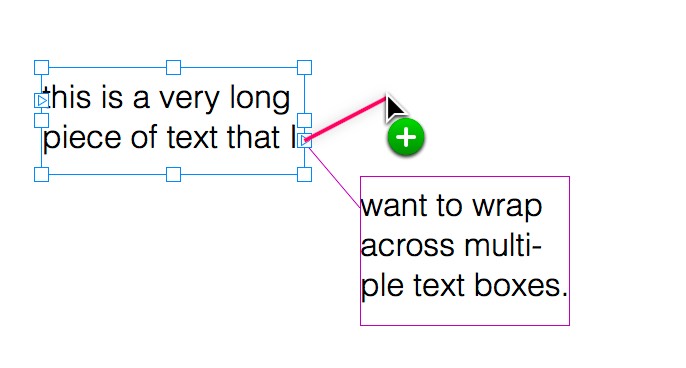
The fastest way to connect this text box to another is to drag from the connection handle onto the target textbox until you see the “Connect” overlay, then releasing the mouse button.
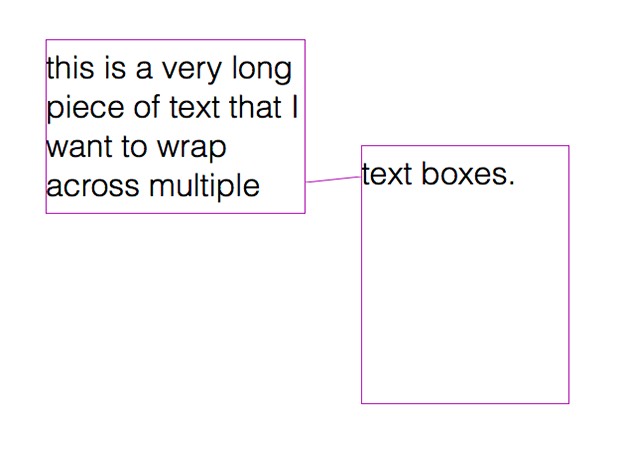
Great, the text boxes are now connected! You can check out how the text reflows by resizing the boxes and watching the text react.

If you want to create a new text box connected to the existing one, you can also drag out into empty space.
This will create a new text box of the same size and style settings as the source text box, and connect it automatically to the source text box.
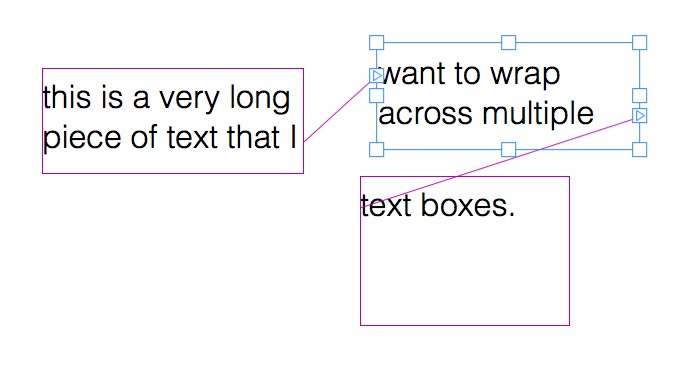
Note that there’s also a connection handle in the top left of a text box, which you can use in a similar fashion to connect or create a predecessor text box.
If you use the connection handles to reconnect a text box that is already connected to another, the newly connected text box will be inserted between the previously connected text boxes.
This is a useful behavior if you want to split up a long text later.
Sometimes, it might be more practical to connect text boxes without having to drag between them, such as if the text boxes are spaced out far apart or are on different pages.
Therefore, you can also connect text boxes via the context menu.
To connect the two text boxes in this way, select and right-click the first text box to bring up the context menu, then select “Mark for Connection”.
Now select the text box you want to connect as a successor text box and bring up the context menu: This time, select “Connect Textbox”. Note that this text box doesn’t need to be on the same page as the predecessor box.
Need more help? Please let us know!